

The Wizard - Part 1
Making a Sprite move around the Screen
This is the first in a four part series to show you how to add some movement and action to your sprite. This first part will go over the basics of getting keyboard input from the player and using it to make the Sprite move around the screen.
Creating the new game project:
We are going to be using the "Sprite" class we created in the tutorial "Creating a 2D Sprite". Instead of creating a new XNA Game project, you can just download the source for that project and begin working from that game project.
If you would rather create a new game project to start from, but are having trouble remembering how to do that, just follow the steps in this tutorial here and come back to the this tutorial after you've refreshed your memory. Once you have your new game project, you will need to add the "Sprite" class created in this tutorial here to your new project.
Adding the images:
 Now, let's add the new sprite image that we are going to be using in this tutorial to the game project. You can download the Wizard image used in the project from here. Once you have downloaded the image, add the new Wizard image to the Content folder in your game. If you are having trouble remembering how to add an image to an XNA Game project, just follow the steps in this tutorial here and come back to this tutorial after you've refreshed your memory.
Enhancing the Sprite class:
To start out, we are going to make some enhancements to the Sprite class. These enhancements were made in the "Advanced Scrolling a 2D Background" project, but we will go over them now.
To begin, start by adding the following objects to the top of the Sprite class.
//The asset name for the Sprite's Texture
public string AssetName;
//The Size of the Sprite (with scale applied)
public Rectangle Size;
//The amount to increase/decrease the size of the original sprite.
private float mScale = 1.0f;
The AssetName is a public object used to store the name of the image to be loaded from the Content Pipeline for this sprite. Size is a public object used to give the current size of the sprite after the scale has been applied. mScale is a private object that will tell the Draw method how much to shrink or enlarge the sprite from it's original size.
Next, we're going to add a property to the class. Properties are often used when you have some other things to do when the value of an object changes. In our case, when the scale of the sprite is changed, we need to recalculate the Size of the sprite with that new scale applied.
Add the following property to the Sprite class.
//When the scale is modified throught he property, the Size of the
//sprite is recalculated with the new scale applied.
public float Scale
{
get { return mScale;}
set
{
mScale = value;
//Recalculate the Size of the Sprite with the new scale
Size = new Rectangle(0, 0, (int)(mSpriteTexture.Width * Scale), (int)(mSpriteTexture.Height * Scale));
}
}
The LoadContent method of the Sprite class needs enhanced as well. Modify the LoadContent method of the Sprite class to look like the following.
//Load the texture for the sprite using the Content Pipeline
public void LoadContent(ContentManager theContentManager, string theAssetName)
{
mSpriteTexture = theContentManager.Load<Texture2D>(theAssetName);
AssetName = theAssetName;
Size = new Rectangle(0, 0, (int)(mSpriteTexture.Width * Scale), (int)(mSpriteTexture.Height * Scale));
}
We added the storing of the asset name and initial calculation of the Sprites size.
Our sprites need to be able to move, so we are going to add a new "Update" method to the class to help us do that. Add the following new Update method to the Sprite class.
//Update the Sprite and change it's position based on the passed in speed, direction and elapsed time.
public void Update(GameTime theGameTime, Vector2 theSpeed, Vector2 theDirection)
{
Position += theDirection * theSpeed * (float)theGameTime.ElapsedGameTime.TotalSeconds;
}
Movement is a simple calculation of taking the direction the sprite should be moving in, the speed they should be moving and multiplying those by the time that has elapsed then adjusting the original position with that result.
theDirection is a Vector2 object. A value of -1 in the X value of the Vector2 will indicate something should be moving to the left. A value of 0 indicates it's not moving at all along the X axis. And a value of 1 indicates the sprite should be moving to the right. The same goes for the Y value of the Vector2. A -1 indicates the sprite needs to move up, 0 not moving in the Y direction and 1 means it's moving down. Combinations of X,Y values cause the sprite to move along both the X, Y axis.
theSpeed is how fast the sprite should move in a along a given axis. Value of 0 means it has no speed along that axis, higher speeds make the sprite move faster along the given axis.
theGameTime is used to keep how fast the sprite moves consistent across different computers. By always moving by how much time has elapsed, if a computer's refresh rate is faster, the sprite should still move the same speed as it does on a computer with a slower refresh rate.
With our sprite successfully changing position, now it's time to draw it to the screen in that new position and with it's potentially new scale. Modify the Draw method of the Sprite class to look like the following.
//Draw the sprite to the screen
public void Draw(SpriteBatch theSpriteBatch)
{
theSpriteBatch.Draw(mSpriteTexture, Position,
new Rectangle(0, 0, mSpriteTexture.Width, mSpriteTexture.Height),
Color.White, 0.0f, Vector2.Zero, Scale, SpriteEffects.None, 0);
}
The SpriteBatch object has several different overrides for Draw (overrides are the same method, but they take additional parameters to give new functionality). In this case, we wanted to re-size the sprite up or down according to Scale so we're passing that in. We're using the defaults for all of the other parameters of that particular override. Eventually in the future we might use them, but for now, we just want to position and scale the sprite.
That's it for the changes to the Sprite class for now. Do a quick Build Build ![]() now to make sure all the changes compile correctly. Nothing will be different in the game yet, but it's good to make sure you don't have any errors before you get to much further.
now to make sure all the changes compile correctly. Nothing will be different in the game yet, but it's good to make sure you don't have any errors before you get to much further.
Adding the Wizard class:
We're going to be moving a Wizard character around on the screen (you added the image for the Wizard to the project earlier). The Wizard is going to be a sprite, but he's going to have some additional functionality special to him as well. To do that, we're going to create a new class called "Wizard" and then inherit from the Sprite class. Inheriting gives you the functionality of the other class and allows you to add to that functionality. It's the basis of object oriented programming.
Right-click on the the game project in the Solution Explorer. Select, "Add", then pick "Class" from the add sub-men. This will open up the "Add New Item" dialog. Type in the name "Wizard" for your class and click the "Add" button.
Now we need to start adding some functionality to the Wizard class. Let's start by adding our XNA framework "using" statements to the top of the Wizard class file.
Add the following "using" statements.
using Microsoft.Xna.Framework;
using Microsoft.Xna.Framework.Storage;
using Microsoft.Xna.Framework.Input;
using Microsoft.Xna.Framework.Content;
using Microsoft.Xna.Framework.Graphics;
These just help with the readability of our code so we don't have to type so much to get at the object provided to us by the XNA framework. For example, we can use Vector2 instead of having to type Microsoft.Xna.Framework.Vector2 every time we want to use that object.
It's is now time to indicate that we want to inherit from the Sprite class. Change the class declaration for the Wizard to look like the following.
class Wizard : Sprite
The Wizard class now inherits from the Sprite class and has access to all of it's public and protected members and methods.
We're gong to be using some values in the class over and over again that do not change. So we're going to make these constants of our class. It's a good programming practice to get into the habit of removing "magic" numbers and strings from your code and moving them into variables and constants. A magic number or string is any number that is just magically in your code with no real explanation of what the value is or why it's that value.
Add the following constants to the top of the Wizard class.
const string WIZARD_ASSETNAME = "WizardSquare";
const int START_POSITION_X = 125;
const int START_POSITION_Y = 245;
const int WIZARD_SPEED = 160;
const int MOVE_UP = -1;
const int MOVE_DOWN = 1;
const int MOVE_LEFT = -1;
const int MOVE_RIGHT = 1;
Now let's add some more class level objects that will help give us the functionality we need to move our Wizard sprite around.
Add the following objects to the top of the Wizard class.
enum State
{
Walking
}
State mCurrentState = State.Walking;
Vector2 mDirection = Vector2.Zero;
Vector2 mSpeed = Vector2.Zero;
KeyboardState mPreviousKeyboardState;
The State enum is used to store the current "State" of the sprite. What is state? You can think of state as any type of action you need to keep track of for you sprite because it might limit another action or "state". So if the sprite was dead, or powered up or jumping or ducking, etc. Those might all be "states" your Wizard could be in and you might want to check to see if the Wizard was in (or not in) a current state before you do something or draw something to the screen.
Currently, our Wizard only has one state, "Walking". mCurrentState is used to track the current state of the sprite and it's set to "Walking" when it's created.
mDirection is used to store the Direction the Wizard is moving in and mSpeed is used to store the Speed the sprite is moving at in those directions.
mPreviousKeyboardState is used to store the previous state the Keyboard was in last time we checked. This is useful for times when we don't want to repeat an action unless a player has pressed a key on the keyboard again instead of just holding it down. With knowing the previous state of the keyboard we can verify the key was released before, but is now pressed and then do whatever action we need to do for that key.
The Wizard needs to load the new Wizard image, so we're going to model after the base sprite class and add a LoadContent method to the Wizard. Add the following LoadContent method to the Wizard class.
public void LoadContent(ContentManager theContentManager)
{
Position = new Vector2(START_POSITION_X, START_POSITION_Y);
base.LoadContent(theContentManager, WIZARD_ASSETNAME);
}
The LoadContent method for the Wizard class does not take in an asset name like the Sprite class does. This is because the Wizard class already knows what asset it needs to load. So first, it sets the initial position of the Wizard (using the constants we declared for the starting x and y positions) and then it calls the "LoadContent" method of the base sprite class it inherits from. It passes into the base LoadContent method the content manager it received in when it's LoadContent method was called and then the constant we declared for the asset name. The "LoadContent" method of the Sprite class will now run and execute all of it's code.
Now, we need to add an "Update" method to the Wizard class. This method will take care of checking for input and moving the sprite around. Add the following Update method to the Wizard class.
public void Update(GameTime theGameTime)
{
KeyboardState aCurrentKeyboardState = Keyboard.GetState();
UpdateMovement(aCurrentKeyboardState);
mPreviousKeyboardState = aCurrentKeyboardState;
base.Update(theGameTime, mSpeed, mDirection);
}
The Update method first gets the current state of the keyboard. This is built in functionality of the XNA framework and by calling "Keyboard.GetState();", the XNA framework will report to you all the keys that are pressed and not pressed on the keyboard.
Next, we call a method "UpdateMovement" passing in the current keyboard state. We haven't written this method yet, but we will shortly.
Then, we store the state of the keyboard in our mPreviousKeyboardState object. This will help us when we get to the point that we need to verify that a key wasn't released and then pressed again. We won't be using this functionality for this tutorial, but it's a good habit to get into to make sure it's available when checking keyboard input because you're bound to need that information eventually.
Finally, we call the Update method of the Sprite class we are inheriting from. We pass in the time that has elapsed and the current values for the Speed and Direction of the Wizard. The Update method of the Sprite class will then use those values to adjust the position of the sprite.
That's it for the Update method, but in it we called an "UpdateMovement" method that didn't exist. Let's go ahead and add that method now. This method will handle all of the checking to see if one of the movement keys was pressed and then setting the movement variables for the sprite).
Add the following "UpdateMovement" method to the Wizard class.
private void UpdateMovement(KeyboardState aCurrentKeyboardState)
{
if (mCurrentState == State.Walking)
{
mSpeed = Vector2.Zero;
mDirection = Vector2.Zero;
if (aCurrentKeyboardState.IsKeyDown(Keys.Left) == true)
{
mSpeed.X = WIZARD_SPEED;
mDirection.X = MOVE_LEFT;
}
else if (aCurrentKeyboardState.IsKeyDown(Keys.Right) == true)
{
mSpeed.X = WIZARD_SPEED;
mDirection.X = MOVE_RIGHT;
}
if (aCurrentKeyboardState.IsKeyDown(Keys.Up) == true)
{
mSpeed.Y = WIZARD_SPEED;
mDirection.Y = MOVE_UP;
}
else if (aCurrentKeyboardState.IsKeyDown(Keys.Down) == true)
{
mSpeed.Y = WIZARD_SPEED;
mDirection.Y = MOVE_DOWN;
}
}
}
The UpdateMovement method is the key method of getting our Wizard sprite to move around. First it checks to make sure the Wizard is in a current state for Walking. Our Wizard can currently ONLY be in a Walking state, but there might be times in the future when we don't want to move him around if he's not currently in a Walking state so we check.
Next, we zero out his direction and speed. Vector2.Zero is a quick and easy way of saying create a new Vector2(0,0). Now we start checking to see what keys are pressed. First we check to see if the Left arrow key or the Right arrow key is pressed. If they are, then we set the Speed along the X axis and indicate the direction. Then we check to see if the Up arrow or the Down arrow are pressed. And again, if they are, then we set the Speed along the Y axis and indicate the direction.
Now, when the base.Update of the Sprite class is called (which happens in our Update method already), the new values for our Wizard speed and direction will be passed and our Wizard sprite will move appropriately.
Do a quick Build ![]() to make sure the Wizard class compiles correctly with no errors. You won't see the Wizard on the screen yet (if you're building this off the "Creating a 2D Sprite" project you should still just see the sprites drawn to the screen and you won't be able to move them. So we still have some final changes to make. We need to change the Game1.cs class to use our new Wizard class instead of the Sprite class.
to make sure the Wizard class compiles correctly with no errors. You won't see the Wizard on the screen yet (if you're building this off the "Creating a 2D Sprite" project you should still just see the sprites drawn to the screen and you won't be able to move them. So we still have some final changes to make. We need to change the Game1.cs class to use our new Wizard class instead of the Sprite class.
Modifying the Game1.cs Class:
We want to remove references to just using the Sprite class and instead use our Wizard class. So to do that we're going to be deleting some code and then adding some new code to replace it.
Delete the following lines of code from the top of the Game1.cs class
Sprite mSprite;
Sprite mSpriteTwo;
Now add the following line of code to the top of the Game1.cs class.
Wizard mWizardSprite;
Now, modify the Initialize method, to look like the following.
protected override void Initialize()
{
// TODO: Add your initialization logic here
mWizardSprite = new Wizard();
base.Initialize();
}
This will create a new instance of our Wizard sprite (and we removed the old lines of code that were creating new instances of the Sprite class).
We now need to load the content of our Wizard. Modify the LoadContent method of the Game1.cs class to look like the following.
protected override void LoadContent()
{
// Create a new SpriteBatch, which can be used to draw textures.
spriteBatch = new SpriteBatch(GraphicsDevice);
// TODO: use this.Content to load your game content here
mWizardSprite.LoadContent(this.Content);
}
With our Wizard sprite content loaded, let's add in the ability for the Game1.cs class to "Update" the Wizard. Modify the Update method to look like the following.
protected override void Update(GameTime gameTime)
{
// Allows the game to exit
if (GamePad.GetState(PlayerIndex.One).Buttons.Back == ButtonState.Pressed)
this.Exit();
// TODO: Add your update logic here
mWizardSprite.Update(gameTime);
base.Update(gameTime);
}
Finally, we want to draw our Wizard. Modify the Draw method of the Game1.cs class to look like the following.
protected override void Draw(GameTime gameTime)
{
graphics.GraphicsDevice.Clear(Color.CornflowerBlue);
// TODO: Add your drawing code here
spriteBatch.Begin();
mWizardSprite.Draw(this.spriteBatch);
spriteBatch.End();
base.Draw(gameTime);
}
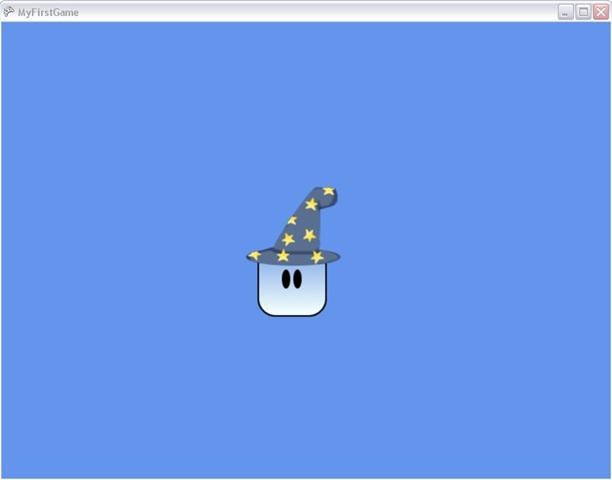
Now that we have appropriately modified the Game1.cs class to use our new Wizard class, do a Build ![]() and see your results. The Wizard should now be drawn to the screen and you should be able to move him around with the Up, Down, Left and Right arrow keys.
and see your results. The Wizard should now be drawn to the screen and you should be able to move him around with the Up, Down, Left and Right arrow keys.
Congratulations! You have successfully figured out how to make a sprite move around the screen in you game. Can you think of some things you can change? Could you add the old Sprites back in and draw them to the screen? What do you think would happen if you tried to add two wizards to the game?
Play with it, experiment and ask questions. Most of all make sure you’re having fun!